Here it is.  The recipe from one of our most popular products sold at the Red Wing Farmer's market.  Everyone loves these scones.  They make a great accompaniment to tea or coffee, and I love to enjoy one for my breakfast.


2 TBSP plus 1 C sugar
2 TBSP fresh orange juice, divided
3 C BE Gluten Free All-purpose flour
1 TBSP baking powder
1 tsp. salt
3/4 C butter, diced (1 1/2 sticks)
1 C dried sweetened cranberries
1/2 C sliced almonds
1/2 C half and half

Position rack in the top third of the oven and preheat to 375 degrees F.  Line baking sheets with parchment paper.  Whisk 2 TBSP sugar and 1 TBSP of orange juice in a bowl for glaze. Set aside.

Whisk flour, baking powder, salt, and 1 C sugar in a large bowl.  Add chilled butter and mix with electric mixer until coarse meal forms.  Mix in cranberries and almonds.  Add 1/2 C half and half and 1 TBSP orange juice.  Mix until dough just comes together in moist clumps.  You may add more half and half if the dough seems too dry. Gather dough into a ball; divide in half.  Press each half on a floured surface to a 6" diameter (1" high) round.  Cut each round into 6 wedges.  Transfer to a baking sheet; brush with glaze.

Bake scones until golden and tester comes out clean, about 18 minutes.


Different types of zucchuni
Image via Wikipedia
If you have a garden and have planted zucchini, you know, like I do, that zucchinis are prolific.  So what can we do with all those zucchini that have come in abundance?  This and the next several posts will be about what I have found to do with all those zucchini.  Of course everyone knows you can make zucchini bread, but you can only take so much of that, so I will be giving recipes for things other than zucchini bread, I'll make my last post in the series the zucchini bread we make and sell at the farmer's market. Today's recipe is one we have made a lot over the years, but we have used winter squash instead of zucchini.  The recipe actually calls for yellow summer squash (yellow zucchini) and we made it as written this year for the first time.  The original recipe came from The New York Times Heritage Cookbook  but it was not gluten free. So we reworked it to be gluten free.


Squash and Cheese Casserole

2 pounds yellow summer squash
boiling water
1 C. onions, chopped
3 sprigs parsley
1/2 tsp thyme
salt and fresh ground pepper to taste
2 TBSP butter
2 TBSP cornstarch
1C. milk
3/4 C. Swiss Cheese
1/4 tsp fresh ground nutmeg
2 egg yolks, lightly beaten
1/4 tsp cayenne pepper
1/4 C. soft almond bread, cubed

Preheat oven to 325 degrees.  Trim ends of squash and cut into rounds and place in a saucepan.  Add boiling water to cover.  Add onions, parsley, thyme, salt and pepper.  Cook briefly until squash is crisp-tender.  Discard parsley and drain squash mixture.  Heat butter in a saucepan and add the cornstarch.  Stir until blended and add the milk,stirring rapidly with a whisk.  When sauce is blended and smooth, remove from heat.  Add half of the cheese, the nutmeg, egg yolks, and cayenne, beating rapidly.  Add squash mixture and pour into a buttered baking dish.  Sprinkle with remaining cheese and bread cubes.  Bake for 25-30 minutes, or until bubbling and golden brown.  Makes 6 servings.
Enhanced by Zemanta


I entered this give away for grass fed sausage package.  Check it out at Food Renegade


Sun-Dried Tomato and Garlic Pizza at Angelo's
Image by Aaron Landry via Flickr

One of the foods that gave me the most grief before I became gluten free was pizza. I would feel the effects for days. Thankfully, pizza dough is one of the first recipes my husband (who would eat pizza every night if he could) was able to create gluten free. Did you know you can bring in a gluten free crust to Pap Murphy's and they will put their toppings on it, so it can be just like the complete pizzas the sell? You do still need to check on their ingredients to make sure they are gluten free and MSG free - but WOW the possibilities are fantastic.

Here is a recipe for the pizza we had last night.  This one has a delicious white sauce.

Dough:


1/2 C. white rice flour
1/2 C. brown rice flour
1/2 C. tapioca flour
1/4 C. potato starch
1/4 C. sorghum
1/2 tsp Xanthan gum
1 1/2 tsp guar gum
1/2 TBSP baking powder
1/2 TBSP yeast
1 1/4 C. warm water


Sauce:


3 TBSP butter
2 TBSP B.E. Nourished Gluten Free all purpose flour mix
1/2 C. Parmesan cheese
1/4 tsp garlic salt
2 C. milk

Toppings:


Mozzarella cheese
cooked chicken, diced
sun dried tomoatoes ( we used our own dried sun gold tomatoes, YUM)
spinach (fresh from our garden)

Directions:


The above crust recipe makes a fantastic crust (or focaccia if you're so inclined) that is dry enough that it can be patted into place on the pizza pan. My husband prefers to add the milk a bit at a time, shooting for a crust that is 'dry enough to roll out' on a well (tapioca) floured surface.

  1. Combine all dry ingredients (except yeast...) in the bowl of a stand mixer fitted with a paddle (or dough hook if you are like my husband) - and combine while prepping the milk and yeast mixture to ensure that the gums are dispersed throughout the flours.

  2. Bring milk to 38 - 45 C (100 - 110 F), add yeast and allow to stand for 5 minutes to ensure that the yeast has 'bloomed'.

  3. Add milk mixture to dry ingredients and combine for 3 minutes on medium to allow gums to hydrate and begin 'binding' to starches. This will also 'loosen' the dough a bit if you are shooting for a slightly drier version by not adding all the milk mixture. The difference is not usually enough to worry about the yeast that doesn't get added at this point.

  4. Oil the pizza stone or pan and scrape dough onto middle of surface. using the tips of your fingers (still oily from pan?!) to press dough into an even layer covering slightly more than out to the edges.

  5. Proof dough in 180 C (350 F) oven for 5 minutes to prevent a 'wet\doughy' crust under the toppings.

  6. While dough is proofing, melt butter in a small sauce pan, add flour mix (as you would for a 'regular' bechamel sauce. Allow to bubble for a minute and then whisk in the milk.

  7. When sauce JUST begins to thicken, remove from heat and add cheese. Stir cheese and garlic into sauce and return pan to heat, stirring continuously until cheese JUST melts.

  8. Remove crust from oven and top with sauce. Add toppings.

  9. Raise oven temperature to 220 C (425 F) and bake pizza on top rack of oven for 15 - 20 minutes or until cheese is to your preferred 'crispness' ;)


Reblog this post [with Zemanta]


We would like to apologize for not posting any new recipes lately...apparently starting a Gluten Free business - and prepping things for sale at the local Farmers Market in Red Wing takes a lot more time than we scheduled for! First-timer gaffs I suppose...

So far everything has been going better than we could have hoped, and it's really been fun getting to know people from all over the state of Minnesota! Not only have we met some wonderful people, but we get to share stories as well as knowledge and experience of the Gluten Free lifestyle choices we all make. We've learned a lot about what people are struggling with, what things they would like to learn about - and best of all: what recipes they'd like to see on the site or even try at the market (Baklava June 5th - come try\buy some)!

If you ever get the chance please come down and say 'Hello'! Look for B.E Gluten Free on Facebook or visit our other blog and help everyone to B.E. Gluten Free!

We look forward to hearing from you!


After playing around a little bit (mostly to eliminate as much rice flour from the final recipe as possible - rice is not something I like to have in any dish that needs
4 eggs
3/4 C. sugar
1/4 C. water
1 tsp. vanilla
1 Cup GF All Purpose flour
1 tsp baking powder
1/4 tsp.salt
powdered sugar
Preheat oven to 375 degrees and prepare a greased and floured 10x15 Jelly Roll pan. Beat eggs for 5 minutes, until they are yellow and fluffy. Add sugar, then water and vanilla. And the rest of the dry ingredients except powdered sugar and mix. Pour into a greased and floured (cornstarch) 10" x 15" pan. Bake until the cake springs back, approximately 10-15 minutes.


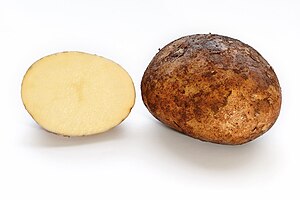
Potato (Aloo)Image via Wikipedia
My husband and I were reducing ham stock yesterday, and I got the craving for potato soup.  I have never made potato soup before and was disappointed with the recipes I saw on line, so I decided to try making my own. My family loved itIt is a hearty soup which can be enjoyed anytime of year, but I look forward to making it with my home grown, organic potatoes, leeks, celery, and carrots this fall. This recipe used home made ham stock, but if you don't like to use pork, you could use a chicken or vegetable stock.

2C. ham stock (homemade)
6-8 potatoes, cubed
1 C. leeks, diced
5 C. water
2 medium carrots, diced
3 stalks celery, diced
2 cloves garlic, minced
1 C. cooked ham,  diced (optional)
cracked pepper to taste
salt to taste
1 C. milk (I prefer to start with raw)
1 C. sour cream
1 tsp. tarragon
1 tsp. Xanthan gum

In a crock pot combine all ingredients except the milk, sour cream, and xanthan gum.  Slow cook for 8-10 hours.  In the last 1 1/2 hours add the milk and sour cream. I was not at home 1 1/2 hours prior to serving, so I heated the milk up to, just under boiling, in a sauce pan and added to the crock pot with the sour cream.  Before serving, thicken the soup with Xanthan gum.  This will produce a smoother soup than without Xanthan gum.  Garnish with Parmesan cheese if desired.


Reblog this post [with Zemanta]


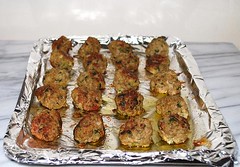
Meatballs
Image by 1JLS via Flickr
My Dad made the best meat loaf and meatballs when I was growing up.  He had his secret little recipe, which he admits was just adding what he thought would taste good.  Unfortunately his recipe used saltine crackers, which I can no longer eat, so my latest challenge was to make a meat ball that was as good as Dad's but gluten free.  Here is what I came up with my first run.  It still needs tweaking,in my opinion, but everyone enjoyed them.
I used 2 pounds of hamburger because I have 4 kids, but you could cut the recipe in half or leave it the same and just have left overs or freeze for an easy dinner later. 

2 pounds  hamburger
3 gloves garlic, minced
1 onion, minced
salt and pepper to taste
1-2 eggs ( depend on the leanness of your hamburger, leaner = more egg)
Gluten free tortilla crumbs
BBQ sauce ( either a reliable gf version or make homemade)


Preheat oven to 350. In a large mixing bowl, mix all of the above ingredients except the BBQ sauce.  I started out with 1/4 C. of the tortilla crumbs and add as needed to produce a mixture that would form nice meat balls.  By hand form the meatballs in to bite sizes and then place on a cookie sheet. When all the meatballs are formed bake in the oven for about 15 minutes, then turn to get them evenly browned.  They can also be made in a frying pan on the stove, but I get better results baking them.  Once the meatballs are cooked all the way through and have a nice golden color, you can transfer to a crock pot or sauce pan and cover with BBQ sauce and heat until sauce is bubbly.  The meatballs will be ready to serve at this point.
Not in the mood for BBQ sauce, you can always use some homemade cream of mushroom soup and have Swedish meatballs instead.
Reblog this post [with Zemanta]


Grass fed meat give-a-way

I know I have been absent of late.  I am working on a cookbook and some research into various gluten free flours.  I wanted to take this time to mention a give-a-way that I think is fantastic.  It is for $100 of grass fed meat.  Go here for the give-a-way.  I would like to win this, because grass fed meat is more nutritiousness and tastes so much better. Who wouldn't want free, high quality meats.

Hope to have a new recipe post soon.


Brownies
Image by yum9me via Flickr
Valentine's Day is just a few days away and my mind wanders to chocolate delicacies.  One of those is a simple brownie.  Several years ago I found a recipe that came from an unusual source.  I home school my kids and use Saxon math.  One of the lessons in third grade math was following a recipe.  That recipe was for brownies.  They were the best brownies I have ever had.  They totally blew away boxed brownie mixes from the store.  Now that I am gluten free we had to rework the recipe.  The only change was to replace the flour with a gluten free mix.  It is such a simple recipe, why would I want to use boxed mixes with inferior taste, quality, and ingredients.

2 squares unsweetened chocolate (organic if possible)
1/2 C. butter
2 Eggs (organic. cage free are best)
1 C. sugar
3/4 C. gluten free all purpose mix
1/2 tsp. baking powder (aluminum free)
1 tsp. vanilla
1/3 C. walnuts( I use pecans because I am allergic to walnuts) optional


Do Not preheat oven!  Melt the chocolate and butter in a double boiler.  In a mixer, beat the eggs and sugar. Add the chocolate and butter and mix well.  Add in the flour and baking powder.  Finally add the vanilla and nuts if you are using.  Pour batter into a greased 8" baking dish.  Bake at 300 degrees for 55 minutes.  These are great plain, but you can frost if you desire.

For other great recipes check out http://www.foodrenegade.com/fight-back-friday-february-12th/#comment-11067
Reblog this post [with Zemanta]


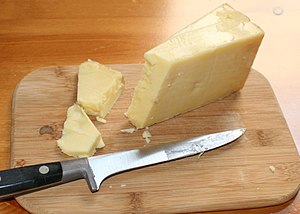
A wedge of Unpasteurised West Country Cheddar ...
Image via Wikipedia
Oh, the power of cheese!  I love cheese.  I have been experimenting with my husband on making the perfect cheese sauce.  I have made many mistakes along the way.  Some of the sauces I came up with were more like cheesy mashed potatoes and others were like cheese jello (threw that out, yuck).  My husband came up with a recipe I think knocks the socks off commercial cheese sauces, in my opinion any way.  This sauce can be used over gluten free noodles to make homemade mac and cheese,  over vegetables, or in any way other cheese sauces are used.

3 TBSP butter
3 TBSP corn starch
2 C. raw milk
3/4 tsp. sea salt
2c. shredded cheese ( your choice, I use cheddar)

In a saucepan, melt the butter over medium heat.  Add cornstarch and stir until well blended.  Slowly add milk and whisk constantly while heating.  Heat until just beginning to bubble and slightly thickened.  Take of heat and stir in cheese.  Now your cheese sauce is ready to use.
Reblog this post [with Zemanta]


List of Filipino dishes
Image via Wikipedia
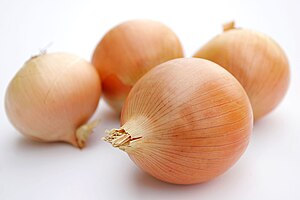
One of my most favored soups is French onion soup.  Several years ago I discovered how very simple it is to make from scratch.  I found the original recipe in The Natural Healing Cookbook.  I have made a few modifications of the oils used and the bread to make it healthier and gluten free.  Serves 2.

1 TBSP coconut oil
1 large onion, thinly sliced (a sweet variety works best)
1 clove garlic, minced
2 C. gluten free chicken stock
2 tsp. wheat free tamari
1/2 tsp blackstrap molasses ( we we out of this and brown sugar does work, but not as well.  You need to use more, around 2 tsp)
1 bay leaf
2 thin slices gluten free sandwich bread, cubed
Parmesan cheese, shredded for garnish

Place oil in stock pot, add onions and saute.  Add a tablespoon water if needed to keep onions from sticking to the bottom of the pan.  When onions are slightly tender, add garlic, stock, tamari, molasses, and bay leaf.  Simmer for 30-45 minutes.  Remove bay leaf.  Place in 2 oven proof bowls. Top with cubed bread and sprinkle with Parmesan cheese.  Place under broiler until cheese is melted and begins to brown.  Careful!!! Soup will be very hot!
Reblog this post [with Zemanta]


Before I chose the gluten free lifestyle, my family loved this recipe found in the Once- A- Month Cooking.  We have been experimenting to try and find a gluten free version that resembles this recipe.  We have had some failures which were tasty but fell apart and wasn't quite what we wanted.  Finally we gave up on the exterior being the same and changes it to a pie crust exterior and found it to be even better than the original version.

4 C. cooked, chopped chicken (organic if possible)
1 -8 oz. package cream cheese, softened
2 TBSP chopped chives
4 TBSP milk (preferably raw)
1 tsp. garlic salt
1 tsp. thyme
pepper to taste
gluten free pie shell ( 2 crusts worth)

Mix chicken, cream cheese, milk, chives, garlic salt, pepper, and thyme in a large mixing bowl.  Preheat oven to 350 degrees.
Roll out pie shell into 2 rectangles, enough for 8 sections each.  Using a pizza cutter, mark 8 sections on one of the rectangles (do not cut all the way through).  Put filling on the center of each section.  Place the second, unmarked rectangle over the rectangle of dough and the piles of filling.
Gently press or stretch this layer of dough over the filling, expect small tears - these will allow moisture to vent from each serving and allow the dough to become crispy during baking. After pressing dough down, use the pizza cutter to cut servings into separate sections.  Using a spatula, place each section on a greased cookie sheet and bake for 20 - 25 minutes or until dough becomes browned and crispy on the edges.
Serves 8


pie crust for quiche
Image by cafemama via Flickr
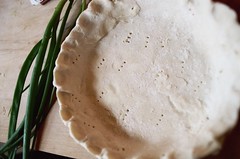
Finding a flaky gluten free pie crust recipe has been a challenge for us. A lot of the recipes have a tough crust that is somewhat chewy.  My husband came up with this recipe while looking for a crust for chicken packets.  We also used it as the crust for lemon bars, of which my Mother-in-law said it was delightful.  It actually is light and flaky like a normal pie crust.

1/2 C. tapioca
1/2 C. cornstarch
1/4 C. potato starch
1 C. sweet white rice
dash of sugar
1/2 C. butter
1/2 C. coconut oil
1 egg
1 TBSP vinegar
4 TBSP ice water
Sweet white rice or Tapioca Starch, for rolling the dough out.

Thoroughly mix all dry ingredients in a bowl large and shallow enough for a small amount of hand kneading near the end of mixing dough. Cut both butter and coconut oil into the dry ingredients until a finely grained, sandy looking mixture is obtained - typically 5 minutes of vigorous cutting with a pastry knife.
Combine the egg, vinegar, and water in a bowl or large cup. Add the liquid ingredients to the dry and combine with a fork until large clumps of dough and almost no dry powder is left.  Knead dough by hand until it remains in a single ball of a very even consistency.  Form dough into a thick disc and wrap dough in plastic wrap (or butcher's paper) and place in the refrigerator for one to two hours.  This will chill the butter and coconut oil to make rolling and handling easier.
When rolled out for use dough should be coated in either White Rice or Tapioca starch, and placed atop a small pile of same to reduce sticking to the surface.  Handle the dough as little as possible as the heat from your hands will soften the dough and make it more difficult to place in the baking dish.
This dough may be rolled out to 1/8" thickness for a crispy\flaky finish, or left up to 1/2" thick for a slightly more 'shortbread' style crust.
Reblog this post [with Zemanta]


Corn
Image via Wikipedia
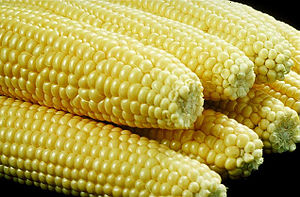
I try to make most of my food from scratch.  It insures what is really in it.  I also try to avoid canned products as much as possible, especially now with the evidence of BPA in can liners.  One of the things that I find much tastier that canned is bread and butter corn, similar to creamed corn.  The commercial version of cream corn uses the seconds and unacceptable corn kermels and mashes them so you can't see how imperfect they were.  Do you really want to be eating infere quality?  Not me.  Last summer, we bought 4 dozen ears of sweet corn from a friend of mine who grows sweet corn.  We used 3 dozen to make bread and butter corn.  We are still enjoying this creamy treat at the end of January.  It is very versatile.  You can eat is as a side dish, throw some in a stew, goulash, chili, or a soup.  It is really easy to make.

Enough corn kernels from sweet corn to fill a 9"x13" baking dish.
1 lb. butter
1 quart cream
salt and pepper to taste.

Fill 9"x13" pan with the corn. Slice pound of butter into pads and spread over the top of corn.  Add the cream.  Bake at 350 degrees for approximately 2 hours, stirring every 30 minutes.  The corn is done when the lernels are tender.  Let cool completely and them put into freezer bags or containers( I recommend glass containers to avoid BPA and Xenoextrogens that plastic can leach into the food).  Put into freezer.  Can be stored in the freezer for up to 1 year for optimum freshness.  To use. thaw in cool water until you can remove from container, then transfer to pan and heat thoroughly and serve. If using inanother recipe, add when you would add other vegetables.
Reblog this post [with Zemanta]


Food for Life distributes food on an internati...Image via Wikipedia
I made this dish for lunch yesterday just by using what I had on hand and some hamburger.  My kids loved it and it was super easy and nutritious.  It makes me very happy when I come up with a nutritious meal that my kids love.  Makes me feel like I have accomplished my goal, for that meal at least.

1 lb. hamburger
1 green pepper, chopped
1 leek, diced
1 onion, diced
2 stalks celery, diced
2 cloves garlic, minced
1 turnip, peeled and diced
8 oz. bread and butter corn ( homemade and frozen, recipe to come in the future)
salt and pepper to taste
1 tsp. turmeric
1 tsp. garlic
1 quart tomato sauce or spaghetti sauce ( I used my homemade spaghetti sauce)
1 C. brown rice, cooked

In a large frying pan, brown the hamburger.  Add in the vegetables and garlic and stir fry until almost tender.  Add the spices and spaghetti sauce and heat until bubbly.  Add rice and heat until rice is heated through.  Serve with feta cheese, or Parmesan on top.
Reblog this post [with Zemanta]


In the mood for sugar cookies ; )
Image by daiseedeb* via Flickr
Sugar cookies are a common holiday treat, but for those who are gluten free it may be hard to find one you can eat.  I was craving sugar cookies, so my family enthusiastically set out on the challenge with me to create a gluten free sugar cookie that waw equal to the regular cookies.  I must admit this still needs a little work, but it is a satisfying alternative.  The cookies ended up spreading a lot, so if anyone has any suggestions on how to prevent this, we'd love to hear therm

1/2 C Almond Meal
1/2 C Sweewt White Rice
1/2 C Brown Rice
3/4 C Corn Starch
3/4 C Tapioca Starch
2 tsp Xanthan Gum
2 tsp Baking Powder
1 C Butter
2 eggs
1 1/2 C sugar
1 tsp. Vanilla

Alternative:
Replace 1/2 C Almond flour with 1/4 C each Tapioca and Corn Starch. This gives a much more Sugar Cookie appearance, but will require the addition of Almond Extract if desired.

Mix all the dry ingredients in a medium bowl.  With an electric mixer, cream the butter and sugar until light and fluffy.  Add the eggs 1 at a time, mixing well after each addition.  Add vanilla and dry ingredients until blended well.  Refrigerate for 2 hours.  Take small portions of the dough at a time and form a disk.  Roll out on a coutner or board that has been lightly dusted with powdered sugar to about 1/4".  Use cookie cutters to cut out shapes.  Put onto cookie sheets leaving about 1-2" between each cookie.  Bake for about 12 minutes (every oven is different so keep an eye on the first batch).  Remove from cookie sheet soon after removal from oven and allow to finish cooling on a cookie rack.  If decorating with icing, make sure cookies are completely cooled before frosting.
Reblog this post [with Zemanta]


Orange ChickenImage by ktpupp via Flickr
One thing that I really miss because I am allregic to MSG, is Chinese food.  I love Chinese food but don't dare to eat it at a restaurant because there are so many hidden names for MSG.  So, I have not eaten Chinese for over a year.
There is a restaurant in our town that has some of the most amazing Chinese, unfortunately it is not MSG free.  One of our favorite dishes was Orange Chicken. My husband and I decided to give an old recipe for orange chicken a gluten free twist.   We were very pleased with the outcome, I especially was happy to be able to enjoy Chinese food again. Good Chinese food DOES NOT have to have MSG!!!

2 lbs. boneless chicken breasts, chopped into bite size pieces
1 egg
1 1/2 tsp. salt
white pepper
oil for frying (preferably coconut)
1/2 C. cornstarch, plus 1 TBSP
1/4 C. tapioca flour
1 TBSP ginger root, minced
1 tsp. garlic, minced
1/2 tsp. crushed hot red chili peppers
1/4 C. green onion, chopped
1 TBSP rice wine
1/4 C. water
1/2 tsp, sesame oil ( we used toasted sesame oil)

Orange Sauce:
1 1/2 TBSP wheat free tamari
1 1/2 TBSP water
5 TBSP sugar
5 TBSP vinegar
zest of 1 orange

Place chicken pieces in a large bowl.  Stir in eggs, salt, pepper, and 1 TBSP oil and mix well.  Stir cornstarch and tapioca flour together. Add chicken pieces, stirring to coat.  Heat oil in a wok or deep-fryer to 375 degrees.  Add chicken, small batches at a time, and fry 3-4 minutes or until golden crisp.(Do not over cook the chicken).  Remove chicken from oil with a slotted spoon and drain on paper towels; set aside.  Clean wok and heat for 15 seconds over high heat.  Add 1 TBSP oil.  Add ginger and garlic and stir-fry until fragrant, about 10 seconds.  Add crushed chilies and green onions and stir-fry.  Add rice wine and stir for 3 seconds.  Add orange sauce and bring to a boil.  Add cooked chicken, stirring until well mixed.  Stir water into remaining 1 TBSP of cornstarch until smooth and add to the chicken.  Heat until sauce is thickened.  Stir in sesame oil and orange zest if desired.  Serve over jasmine rice or fried rice.
Reblog this post [with Zemanta]


Ham with cloves
Image via Wikipedia
Breakfast time can be challenging for those who are gluten free.  Many of the commercial gluten free cereals are not the best tasting.  My sister-in-law had a great breakfast egg bake that we worked on together to make gluten free.  Here is the delicious recipe we came up with.


1/2 C.  Sorghum flour
1/2 C. Corn starch
1/2 C. Tapioca Flour
1/2 C. Sweet white rice flour
2 TBSP baking powder
1/2 tsp salt
1 C. ham, cooked and diced
1 C. cheese, shredded
4 C.  Milk
8 eggs
salt and pepper to taste.

Grease a 9x13 pan. Layer the cheese and cubed ham.  Mixed the egg, milk, and dry ingredients in a medium bowl.  Pour over the ham and cheese.  Bake at 400 for 30-40 minutes, until the top looks golden brown.
Reblog this post [with Zemanta]


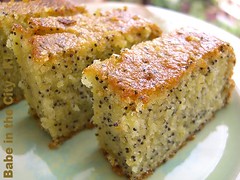
Orange Poppy Seeds CakeImage by babe_kl via Flickr
I love the combination of lemons and poppy seeds.  The tartness of the lemons mixed with the crunch of the poppy seeds is perfection.  I have been searching for a gluten free version of a poppy seed cake and have converted a recipe that I loved before becoming gluten free.  This recipe makes a very nicely textured cake that resembles the regular version.  For all those poppy seed lovers, Bon Appetit

1 C. butter
1 8 oz. package cream cheese, softened
6 eggs
2 1/4 C. tapioca flour
3/4 C. white rice flour
1 1/2 tsp. guar gum
1 tsp. baking powder
1/4 tsp salt
2 1/4 C. granulated sugar
1/4 C. poppy seeds
2 tsp. vanilla

Lemon Icing:
1 1/2 C. powdered sugar
1/2 tsp. finely shredded lemon peel
1-2 TBSP lemon juice

Bring butter, cream cheese and eggs to room temperature.  Grease and lightly flour with tapioca flour a 10" tube pan.  Combine flours, baking powder, and salt.  Set aside.
 In a large mixing bowl, beat butter and cream cheese with an electric mixer on medium to high speed for about 30 seconds or until softened.  Gradually add sugar, 2 TBSP at a time, beating on medium for about 5  minutes or until very light and fluffy.  Add poppy seeds and vanilla.  Add eggs, one at a time, beating on medium for 1 minute after each addition and scraping bowl frequently.  Gradually add flour mixture, beating on low speed just until combined.  Pour batter into pan.
Bake at 325 for about 75 minutes or until wooden toothpick inserted in center comes out clean.  Cool in pan on wire rack for 15 minutes.  Remove from pan.  Cool completely on wire rack.  Drizzle lemon icing over
cake.
Lemon icing:  In a small bowl combine all the icing ingredients and stir until it reaches a drizzling consistency.  Drizzle over cooled cake.
Reblog this post [with Zemanta]


Vegetarian Italian Sausages
Image by Kristin Brenemen via Flickr
Many sausage products out there have MSG in them.  Even if you find one without MSG it most likely will have  nitrites in them.  Nitrites are linked to cancers, so I like to eat foods that are as natural as possible and nitrites free.  This usually means I need to make them from scratch.  I found a wonderful recipe for homemade Italian sausage in a La Leche League cookbook.  I don't use a lot of pork, so I converted it to one that uses beef.

1 pound ground beef (organic is preferred)
1 medium onion, minced
1 1/2 tsp. salt
1 clove garlic, minced
1/2 tsp. pepper
1/2 tsp. fennel seed, crushed
1/4 tsp. paprika
1/8 tsp. thyme
1/8 tsp. cayenne pepper

Knead all of the ingredients into the ground beef.  The mixture may now be formed into patties, loaves, links, or browned.  For the best flavor the sausage should be refrigerated in an air tight container for 2-3 days before use.  If you use the sausage immediately the flavors will not be as strong. If you cannot use all the sausage, freeze it.  It will keep in the freezer for 1-2 months.


Reblog this post [with Zemanta]


Eggs!
Image by Phae via Flickr
The original recipe for this was not gluten free and used store bought sausage, which may or may not be MSG free.  I really liked it before I became gluten free, so I decided to rework it and make it gluten and MSG free by making my own sausage, and using gluten free bread.  I served this on New Year's Day and everyone loved it.

1 pound homemade Italian sausage
4 1/2C. day old almond bread
2 C. sharp cheddar, shredded
10 eggs slightly beaten (organic if possible)
4C. organic whole milk
1 tsp. dry mustard
1 tsp. salt
1/4 tsp. onion powder
freshly ground pepper to taste
1/2 C. sliced mushrooms, sauteed
1/2 C. diced tomatoes
1/2 of a sweet pepper
1 onion, minced

Heat a skillet on medium.  Break up the sausage into chunks and cook, until browned completely.  Place bread in a well buttered (or coconut oil) 9" X 13" baking pan.  Sprinkle with cheese.  Combine eggs, milk, dry mustard, onion powder, and pepper.  Pour evenly over the bread and cheese.  Sprinkle sausage and the remaining ingredients over the top.  At this stage, you can chill overnight or let sit for 10 minutes before putting in the oven.  Preheat oven to 325 degrees.  Bake uncovered for about 1 hour ( a little longer if you chilled over night).
Reblog this post [with Zemanta]


dairy-free gluten-free chocolate chip cookies
Image by elana's pantry via Flickr
Chocolate chip cookies are something most everyone relate to.  I love a good cookie now and then, but since going gluten free, I have found it less of a craving. Last night, my whole family was craving a sweet treat, so we decided to try and rework a recipe we used before going gluten free.  It was a Neiman Marcus cookie recipe, but with a twist.  Not only did we substitute for gluten free flours, but we decided to add some gluten free oats and raisins into the recipe.  The result was a cookie with crispness on the outside and soft in the middle.  Perfect accompaniment to a cup of coffee or tea.

1/2 C. butter, softened
1C. brown sugar
3 TBSP sugar
1 egg
2 tsp. vanilla
1/2 tsp. baking soda
1/2 tsp. salt
1/2 C. Almond meal
1/2 C. white rice flour
3/4 C. tapioca
1/2 C. oatmeal
1/2 C. raisins
1/2 tsp. xanthan gum
8 oz. semi-sweet chocolate chips

Preheat oven to 375 degrees.  Cream butter with sugars until fluffy.  Beat in the egg and vanilla.  Combine the dry ingredients and beat into the butter mixture. Stir in the chocolate chips and raisins.  Drop by large spoonfuls onto a greased cookie sheet.  Bake at 375 degrees for 8-10 minutes.  Move to a cooling rack immediately.


Reblog this post [with Zemanta]